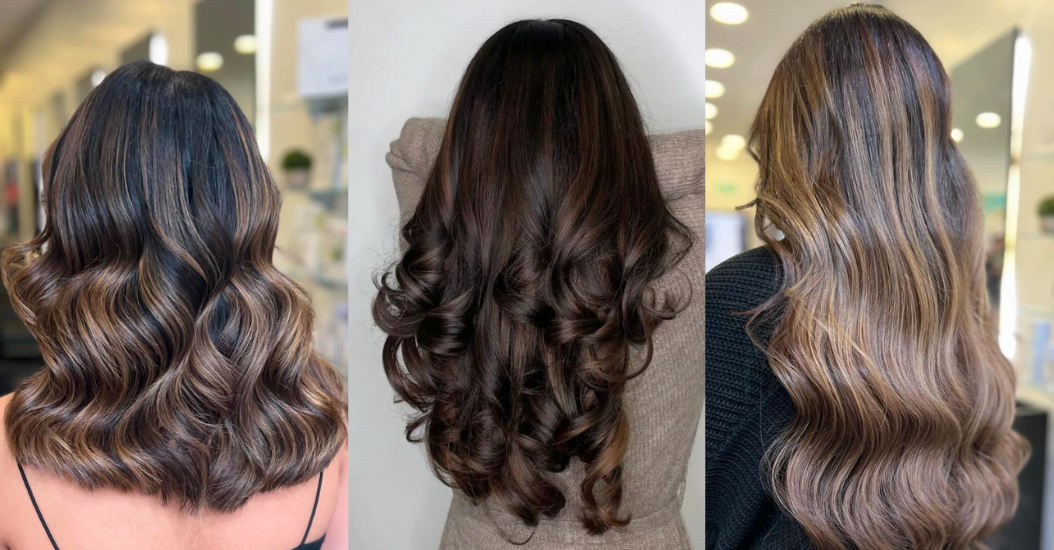
Heatless curls have quickly gained popularity as a safe, low-effort way to achieve beautiful waves and curls without the heat damage! Whilst this method is simple and gentle, many people struggle with making their heatless curls last throughout the day or achieving their desired shape. This guide will walk you through expert advice, practical tips, and proven techniques to help you create long-lasting, bouncy curls with zero heat damage!
Understanding Heatless Curls and Their Benefits
Heatless curls are a styling method that shapes hair into curls or waves without heat, using techniques like braids, twists, buns, or rollers to set the pattern as the hair dries. Avoiding heat helps protect hair health by minimising damage, reducing dryness and breakage, and preserving the hair’s natural texture. Despite common myths, heatless curls can hold well and work across a wide range of hair types – when done correctly with the right prep and products. Heat curls are a reliable, gentle alternative to traditional heat styling!
Preparing Your Hair for Long-Lasting Heatless Curls
Heatless curls can work beautifully on most hair types. Fine hair benefits from lightweight products for hold without heaviness, thick hair may need smaller sections or longer setting time, naturally curly hair can use heatless methods to enhance definition, and straight hair often needs extra prep for lasting results. For the best results, start with clean, slightly damp hair. Using the right styling products like mousse, hairspray and texturising spray can make a significant difference. Professional stylists can help tailor product choices to suit your specific hair type and goals.
Top 10 Professional Heatless Curling Techniques
1. Twist Curls
Twist curls are a simple yet effective heatless method where sections of damp hair are twisted tightly into spirals and left to dry naturally or overnight. This technique creates defined, bouncy curls without heat, and the intensity of the curl can be adjusted depending on how tightly you twist the hair.
- Start by washing and conditioning your hair with products that support curl definition and moisture.
- Apply a leave-in conditioner or curl cream to damp hair, ensuring it’s evenly distributed to help with hold.
- Section your hair into small to medium-sized parts, depending on how tight or loose you want the curls.
- Take each section of hair and twist it tightly from the roots to the ends. The tighter you twist, the tighter your curls will be.
- Secure each twist with a small hair tie or clip to hold it in place.
- Allow the twists to dry completely, this could take several hours or overnight, depending on your hair’s thickness and texture.
- Once dry, gently unwind each twist. Use your fingers to separate the curls for a voluminous, natural finish.
Pros and Cons of Twist Curls:
Pros:
- Simple and easy to do: Requires minimal effort and no special tools.
- Customisable: The tightness of the twists can be adjusted to create different curl types, from loose waves to tighter ringlets.
- No heat required: Perfect for keeping your hair healthy by avoiding heat styling.
- Suitable for most hair types: Works well for straight, wavy, or slightly curly hair.
Cons:
- Time-consuming: Takes several hours to dry fully, especially if you have thick or long hair.
- Tightness is key: The tighter the twist, the more defined the curl; however, it can be difficult to get even twists, especially if you’re new to the technique.
Best Hair Type for This Method:
- Straight to Wavy Hair: Twist curls work particularly well on straight to wavy hair, as the curls hold better on hair that isn’t too coarse or thick.
- Medium to Fine Hair: Twist curls create volume and bounce, making them ideal for those with medium or fine hair textures.
- Textured Hair: If you have naturally curly or frizzy hair, twist curls can help to enhance your natural texture, though the technique may need to be adjusted to prevent over-drying.
2. Sock Bun Curls
Sock bun curls are a popular heatless styling method that uses a rolled sock to create soft, voluminous curls or waves without any heat. By wrapping damp hair around a sock bun and allowing it to set, you can achieve smooth, bouncy curls, making it the perfect option for an effortless, overnight style.
- Start by washing and conditioning your hair with hydrating products to ensure smooth, frizz-free results.
- Towel-dry your hair until it’s slightly damp, not soaking wet, as this helps the curls set more effectively.
- Apply a lightweight mousse or styling cream to add hold and enhance curl formation.
- Gather your hair into a high ponytail and secure it with a hair tie.
- Take a sock bun (or a rolled-up sock shaped into a donut) and place it at the base of your ponytail.
- Wrap sections of your hair around the sock, rolling it downward until all hair is secured in a bun shape.
- Leave the bun in place until your hair is completely dry – this can be overnight or several hours during the day.
- Once dry, gently unravel the bun and separate the curls with your fingers for a soft, voluminous finish.
Pros and Cons of Sock Bun Curls
Pros:
- Easy and low maintenance: Once secured, you can leave it in place without much effort.
- Creates soft, voluminous curls: Ideal for achieving loose waves or bouncy curls.
- Heat-free styling: Helps maintain healthy, damage-free hair.
- Great for overnight styling: Wake up with ready-to-go curls.
Cons:
- Best for longer hair: Short hair may not wrap easily around the sock bun.
- Long drying time: Thick or dense hair may take longer to fully dry.
- Less defined curls: Results tend to be softer waves rather than tight curls.
Best Hair Type for This Method:
- Medium to Long Hair: Works best on hair that can be easily wrapped around the bun.
- Fine to Medium Hair: Helps create volume and body without weighing hair down.
- Straight to Wavy Hair: Ideal for adding movement and soft curl patterns to naturally straight textures.
Product Pairings for This Method:
- Volumising Mousse: Adds structure and helps the curls hold their shape.
- Leave-In Conditioner: Keeps hair hydrated and smooth while reducing frizz.
- Light Texturising Spray: Enhances definition and adds a natural, tousled finish after removing the bun.
3. Bantu Knots
Bantu knots are a heatless styling technique where sections of damp hair are twisted and wrapped into small knots, creating defined, springy curls once unravelled. This method not only produces long-lasting curls but also works as a protective style.
- Start by washing and conditioning your hair to ensure it’s clean, moisturised, and ready to hold the style.
- Apply a leave-in conditioner or curl cream to damp hair to add hydration and improve definition.
- Section your hair into small to medium parts, depending on how tight or loose you want your curls.
- Take one section and twist it tightly from root to tip.
- Wrap the twisted section around itself to form a small knot close to the scalp.
- Secure the knot with a hair tie, pin, or by tucking the ends underneath.
- Repeat this process across your entire head, ensuring sections are even for consistent curls.
- Allow the knots to dry completely – this may take several hours or overnight.
- Once fully dry, gently unravel each knot and separate the curls with your fingers for added volume and shape.
Pros and Cons of Bantu Knot Curls:
Pros:
- Defined, long-lasting curls: Creates tight, springy curls with great hold.
- Dual-purpose style: Acts as both a protective style and a curl-setting method.
- No heat required: Maintains hair health while styling.
- Versatile results: Section size controls curl tightness and overall look.
Cons:
- Time: Sectioning and knotting can take time, especially on thick hair.
- Drying time: Knots must be completely dry to avoid frizz or uneven curls.
- Tension sensitivity: If wrapped too tightly, knots can feel uncomfortable on the scalp.
Best Hair Type for This Method:
- Natural and Textured Hair: Particularly effective on coily, curly, or textured hair types for enhancing definition.
- Thick Hair: Holds knots well and produces fuller, more voluminous curls.
- Wavy to Straight Hair: Can still achieve curls, though results may be slightly looser and require more product for hold.
Product Pairings for This Method:
- Curl-Defining Cream: Helps shape and hold curls while reducing frizz.
- Moisturising Leave-In Conditioner: Keeps hair soft and hydrated during the setting process.
- Light Oil or Shine Serum: Apply after unravelling to add shine and separate curls without frizz.
4. Headband Curls
Headband curls are a gentle, heatless method that creates soft, romantic waves by wrapping damp hair around a fabric headband. This technique is comfortable enough to wear overnight and produces loose, natural-looking curls with minimal effort.
- Start with clean, slightly damp hair and brush through to remove any tangles.
- Place a soft, elastic headband over your head, sitting it like a halo.
- Apply a lightweight styling product, such as mousse or curl cream, for added hold.
- Take small sections of hair and wrap them around the headband, tucking them through until all hair is secured.
- Continue wrapping until all sections are incorporated neatly around the band.
- Leave the hair to dry completely – ideally overnight for best results.
- Gently unwind each section from the headband once dry.
- Use your fingers to separate and soften the curls for a natural finish.
Pros and Cons of Headband Curls:
Pros:
- Comfortable overnight style: Easy to sleep in compared to other methods.
- Creates soft, natural waves: Ideal for an effortless, everyday look.
- Quick setup: Takes only a few minutes to wrap hair.
- No heat damage: Keeps hair healthy and smooth.
Cons:
- Less defined curls: Results are more wave-like than tight curls.
- May slip: Headband can move if not secured properly.
- Not ideal for very short hair: Requires enough length to wrap around the band.
Best Hair Type for This Method:
- Medium to Long Hair: Provides enough length to wrap easily.
- Fine to Medium Hair: Holds soft waves well without becoming weighed down.
- Straight to Wavy Hair: Perfect for adding gentle movement and texture.
Product Pairings for This Method:
- Lightweight Mousse: Adds hold without stiffness.
- Leave-In Conditioner: Keeps hair soft and frizz-free.
- Flexible Hold Hairspray: Helps maintain waves while keeping them touchable.
5. Hair Donut Curls
Hair donut curls use a foam donut (like a bun maker) to create voluminous, loose curls or waves. This method is simple and effective, giving a polished, bouncy finish without heat.
- Begin with slightly damp, detangled hair.
- Apply a styling product like mousse or texturising spray for grip and hold.
- Pull your hair into a high ponytail and secure it with a hair tie.
- Slide the hair donut onto the ponytail and position it at the base.
- Wrap sections of hair evenly around the donut, covering it completely.
- Tuck the ends in securely so the bun holds its shape.
- Leave the style in place until your hair is fully dry.
- Remove the donut and gently separate the curls with your fingers.
Pros and Cons of Hair Donut Curls:
Pros:
- Adds volume and bounce: Great for fuller-looking hair.
- Simple technique: Easy for beginners to master.
- Heat-free styling: Protects hair from damage.
- Polished finish: Creates smooth, uniform curls.
Cons:
- Requires length: Not suitable for short hair.
- Long drying time: Dense hair may take longer to set.
- Loose curl pattern: Doesn’t create tight ringlets.
Best Hair Type for This Method:
- Medium to Long Hair: Best suited for wrapping around the donut.
- Fine Hair: Adds noticeable volume and body.
- Straight Hair: Helps create soft waves that hold with the right prep.
Product Pairings for This Method:
- Volumising Mousse: Boosts body and structure.
- Texturising Spray: Adds grip for better curl formation.
- Light Serum: Smooths ends and adds shine after styling.
6. Heatless Curly Ponytail
The heatless curly ponytail is a quick and versatile method that creates defined curls while keeping hair styled in a ponytail. It’s ideal for those who want both function and style, offering curls that can be worn up or taken down later.
- Start with damp, detangled hair.
- Apply a curl-enhancing product such as mousse or curl cream.
- Gather your hair into a ponytail at your desired height and secure it.
- Divide the ponytail into several sections.
- Twist or braid each section tightly to create curl definition.
- Secure the ends of each section with small elastics if needed.
- Allow the hair to dry completely while in the ponytail.
- Once dry, either leave the ponytail as is for a textured look or undo the sections for loose curls.
Pros and Cons of Heatless Curly Ponytail:
Pros:
- Quick and practical: Combines styling and curling in one step.
- Versatile: Can be worn as a ponytail or styled down.
- Low effort: Simple method with minimal tools required.
- No heat damage: Keeps hair healthy and strong.
Cons:
- Less volume at roots: Curls are concentrated in the ponytail.
- May create uneven curls: Section size impacts consistency.
- Elastic marks: Can leave slight indentations at the base.
Best Hair Type for This Method:
- All Hair Types: Works across textures with slight adjustments.
- Medium to Long Hair: Easier to section and style effectively.
- Wavy to Straight Hair: Benefits most from added curl definition.
Product Pairings for This Method:
- Curl Cream: Enhances definition and smoothness.
- Styling Mousse: Provides hold and structure.
- Light-Hold Spray: Keeps curls intact without stiffness.
7. Pin Waves
Pin waves are a classic heatless styling technique that involves shaping small sections of hair into flat, circular waves pinned close to the scalp. This method creates soft, vintage-inspired waves or defined curls, depending on how the hair is set.
- Start with clean, damp hair and comb through to remove tangles.
- Apply a setting lotion or lightweight mousse to help hold the shape.
- Section your hair into small, even parts.
- Take one section and wrap it around your fingers to form a flat loop.
- Lay the loop against your scalp and secure it with a pin or clip.
- Repeat across your head, ensuring all sections are evenly pinned.
- Allow hair to dry completely – air drying or overnight works best.
- Remove the pins gently and brush through for soft waves or separate with fingers for defined curls.
Pros and Cons of Pin Waves:
Pros:
- Classic, polished finish: Ideal for vintage or glam styles.
- Long-lasting results: Holds shape well with the right prep.
- Heat-free: Protects hair from damage.
- Versatile: Can create waves or curls depending on technique.
Cons:
- Time-consuming: Requires careful sectioning and pinning.
- Learning curve: Takes practice to get even shapes.
- Can be uncomfortable: Sleeping in pins may not suit everyone.
Best Hair Type for This Method:
- Fine to Medium Hair: Holds shape particularly well.
- Straight to Wavy Hair: Ideal for forming smooth, uniform waves.
- Short to Medium Length Hair: Easier to manage and pin neatly.
Product Pairings for This Method:
- Flexible Hold Hairspray: Essential for structure and hold.
- Lightweight Mousse: Adds volume and flexibility.
- Shine Serum: Enhances the finished look with gloss and smoothness.
9. Velcro Rollers 90s Blowout
Velcro rollers are perfect for achieving a voluminous, 90s-style blowout without using heat tools. They lift the roots and create soft, bouncy movement, mimicking a salon blow-dry effect.
- Start with slightly damp or mostly dry hair.
- Apply a volumising mousse or blow-dry spray for structure and hold.
- Section your hair, focusing on the crown for maximum volume.
- Roll each section upward onto a Velcro roller, away from the face.
- Secure rollers if needed, especially for thicker hair.
- Allow hair to fully dry or set for several hours.
- Remove rollers gently, starting from the bottom sections.
- Style with fingers or a brush for a soft, bouncy finish.
Pros and Cons of Velcro Rollers:
Pros:
- Creates volume at the roots: Ideal for a full, lifted look.
- Salon-style finish: Mimics a professional blowout.
- Easy to use: Beginner-friendly method.
- Heat-free option: Reduces styling damage.
Cons:
- Best on longer hair: Short hair may not wrap well.
- Can tangle: Needs careful removal to avoid pulling.
- Less curl definition: Focuses more on volume than tight curls.
Best Hair Type for This Method:
- Medium to Long Hair: Best suited for rolling and volume.
- Fine Hair: Gains noticeable body and lift.
- Straight to Slightly Wavy Hair: Ideal for smooth blowout styles.
Product Pairings for This Method:
- Volumising Mousse: Adds body and hold.
- Root-Lifting Spray: Enhances lift at the crown.
- Flexible Hairspray: Keeps the bounce without stiffness.
9. Bouncy Pin Curls
Bouncy pin curls are a more defined version of traditional pin curls, creating springy, structured curls with lots of movement and volume. This method is ideal for achieving a glamorous, full-bodied look.
- Begin with clean, damp hair and detangle thoroughly.
- Apply a curl-enhancing cream or mousse for definition.
- Section hair into small, even parts.
- Wrap each section around your finger to form a loop.
- Roll the loop upward toward the scalp for extra bounce.
- Secure each curl with a clip or pin.
- Allow hair to dry completely before removing pins.
- Gently separate curls for volume and shape.
Pros and Cons of Bouncy Pin Curls:
Pros:
- Defined, springy curls: Great for volume and structure.
- Long-lasting: Holds shape well throughout the day.
- Heat-free styling: Maintains hair health.
- Customisable: Section size controls curl tightness.
Cons:
- Time-consuming: Requires patience and precision.
- Drying time: Needs full drying for best results.
- Can feel tight: May be uncomfortable if pinned too firmly.
Best Hair Type for This Method:
- Fine to Medium Hair: Holds curls effectively.
- Straight Hair: Benefits from added structure and volume.
- Shoulder-Length or Longer Hair: Easier to roll and pin.
Product Pairings for This Method:
- Curl Cream: Enhances definition and reduces frizz.
- Leave-in Conditioner: Locks in the curl pattern.
- Hair Oil: Adds shine and separates curls softly.
10. Pipe Cleaners Method
The pipe cleaners method is a creative heatless curling technique where flexible pipe cleaners are used to wrap sections of hair, creating tight, spiral curls with strong definition. It’s especially popular for achieving uniform, long-lasting curls.
- Start with damp, detangled hair.
- Apply a curl cream or mousse for hold and definition.
- Section hair into small parts for tighter curls.
- Take a pipe cleaner and wrap a section of hair around it from root to tip.
- Bend the pipe cleaner to secure it in place.
- Repeat across the head until all sections are wrapped.
- Allow hair to dry completely-overnight is ideal.
- Remove pipe cleaners carefully and separate curls gently.
Pros and Cons of Pipe Cleaners Method:
Pros:
- Tight, defined curls: Creates uniform spiral curls.
- Long-lasting results: Holds shape for extended periods.
- Flexible tools: Easy to shape and secure.
- Heat-free: Protects hair from damage.
Cons:
- Time-consuming: Requires detailed sectioning.
- Uncomfortable for sleep: Pipe cleaners can feel bulky.
- More effort to remove: Needs careful handling to avoid tangling.
Best Hair Type for This Method:
- Natural and Textured Hair: Excellent for enhancing curl definition.
- Medium to Thick Hair: Holds shape well with strong structure.
- Wavy to Straight Hair: Can achieve tighter curls with proper prep.
Product Pairings for This Method:
- Strong-Hold Curl Cream: Ensures definition and longevity.
- Moisturising Leave-In Conditioner: Prevents dryness during setting.
- Shine Serum: Adds gloss and smoothness after styling.
Maximising Curl Longevity: Expert Tips and Tricks
To help heatless curls last longer, focus on how you set them – wrap hair firmly and evenly without pulling too tight, and use styling products that provide hold while maintaining flexibility.
Overnight care is just as important; protect your curls by sleeping on a silk pillowcase, wearing a satin or silk wrap, or loosely securing hair in a bun or braid to prevent frizz and flattening. Once styled, finish with the right products, such as a lightweight mousse, setting spray, or flexible-hold hairspray, to lock in shape and bounce without making the hair feel stiff or heavy.
Common Challenges and How to Fix Them
If your heatless curls fall flat or lack volume, try building more texture with a texturising spray, using smaller sections, or switching up your wrapping technique to create tighter, longer-lasting curls. To manage frizz without heat, focus on hydration and protection – use a lightweight serum, avoid over-touching the hair, and ensure strands are fully dry before unravelling. Humidity can cause curls to drop or frizz, so opting for tighter curl patterns, and finishing with a flexible hold hairspray can help maintain shape and definition throughout the day.
Maintenance and Aftercare for Heatless Curls
To keep heatless curls looking fresh between washes, lightly mist sections with water or a curl refresher spray and reshape them with your fingers or use dry shampoo at the roots to restore volume and lift. Preventing damage and breakage comes down to being gentle – avoid overly tight wrapping, and prioritise nourishing, hydrating products that keep hair strong and flexible. In terms of maintenance timing, it’s best to refresh curls for 1 – 2 days before restyling, and wash when build-up or loss of shape becomes noticeable, allowing hair time to recover and hold future styles more effectively.
Book An Appointment with Rush
Book an in-salon appointment for hair guidance at Rush to get expert advice on hairstyling tailored to your hair type and texture.
FAQ's
Can heatless curls work on all hair types?
Yes – heatless curls can work on most hair types, but the method and products should be adjusted depending on your hair type for best results.
How long do heatless curls usually last?
They typically last 1 -3 days, depending on your hair type, preparation, products used, and how well they are protected while sleeping.
What products help heatless curls hold better?
Mousse, curl cream, and light-hold hairspray all help improve definition, hold, and longevity without weighing the hair down.